Transfer Files with Globus
Globus is a robust file-sharing and transfer service. Globus calls a collection of files an endpoint. The RCC has several Globus endpoints. This guide explains how to make your computer a Globus endpoint and transfer files between Globus endpoints. Put another way, this guide explains how to move files between your local system (i.e., your computer, lab computers, etc.) and the RCC's Midway 2 and 3 ecosystems.
Note that this guide focuses on transferring files through the Globus web app. Advanced users can access additional functionality by using the Globus command line interface (CLI), a standalone app that you can install on your computer and then use to access Globus.
Make Your Computer a Globus Endpoint
Follow the instructions in the Globus documentation to install Globus Connect Personal and make your computer a Globus endpoint (also called a collection). When Globus Connect Personal asks you to authenticate (Step 4), log in with your UChicago CNetID.
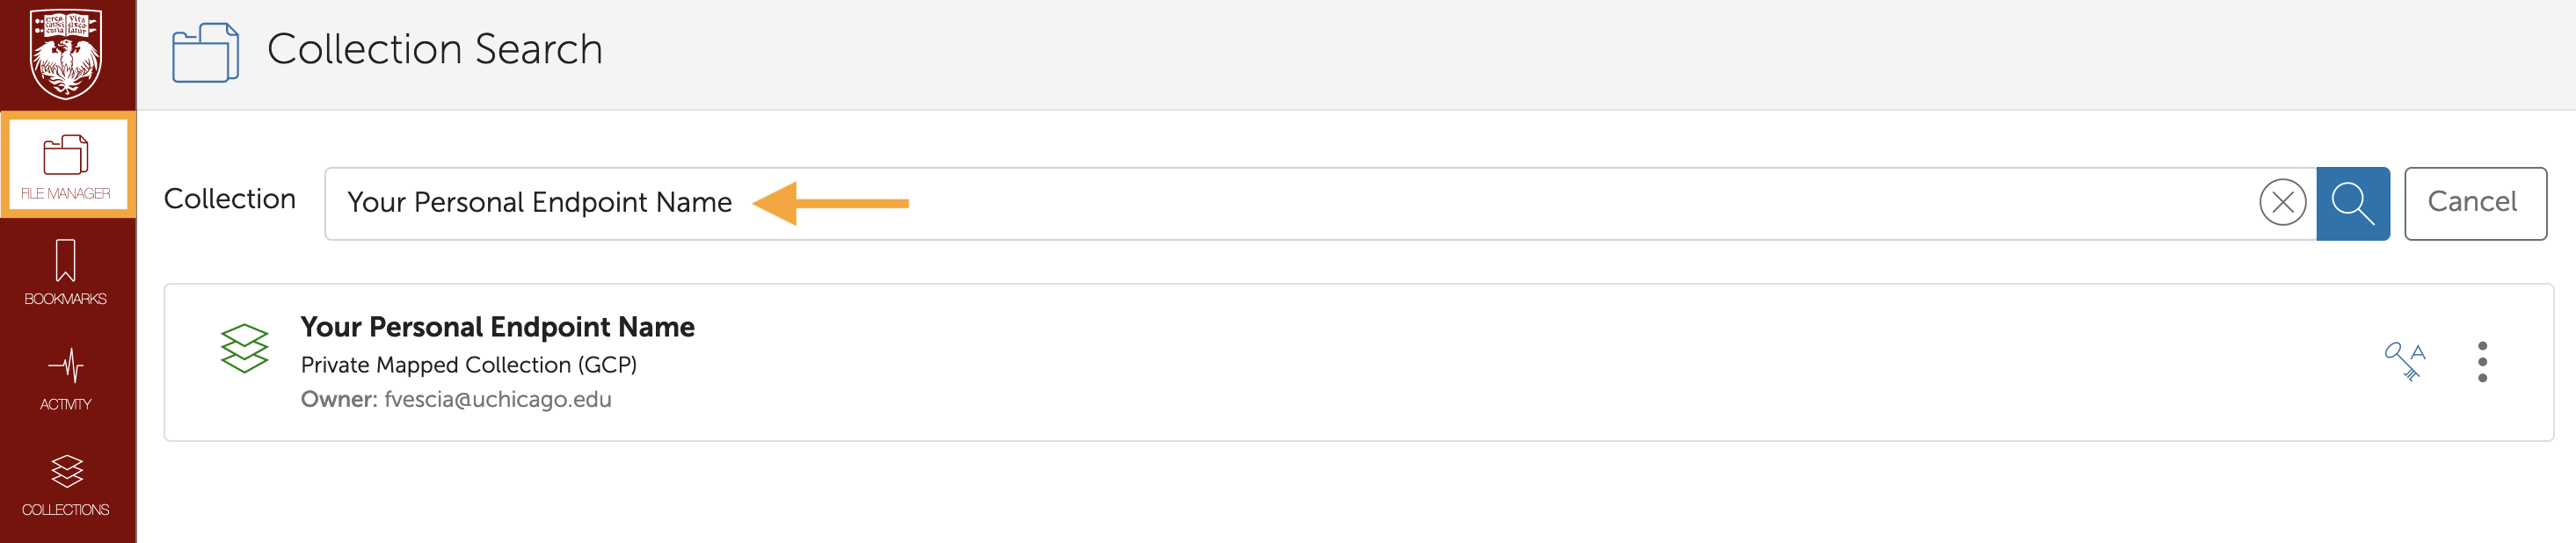
Once your computer is a Globus endpoint, you will be able to access files stored on your local system, as well as files stored in the RCC's ecosystems, from globus.rcc.uchicago.edu. To access your locally stored files, click the "File Manager" in the toolbar on the left of your screen and type the name you gave your personal endpoint into the collection search bar:
Manually Transfer Files
To see files in different collections at the same time, click the "two panes" icon next to "Panels" in the upper-right corner:
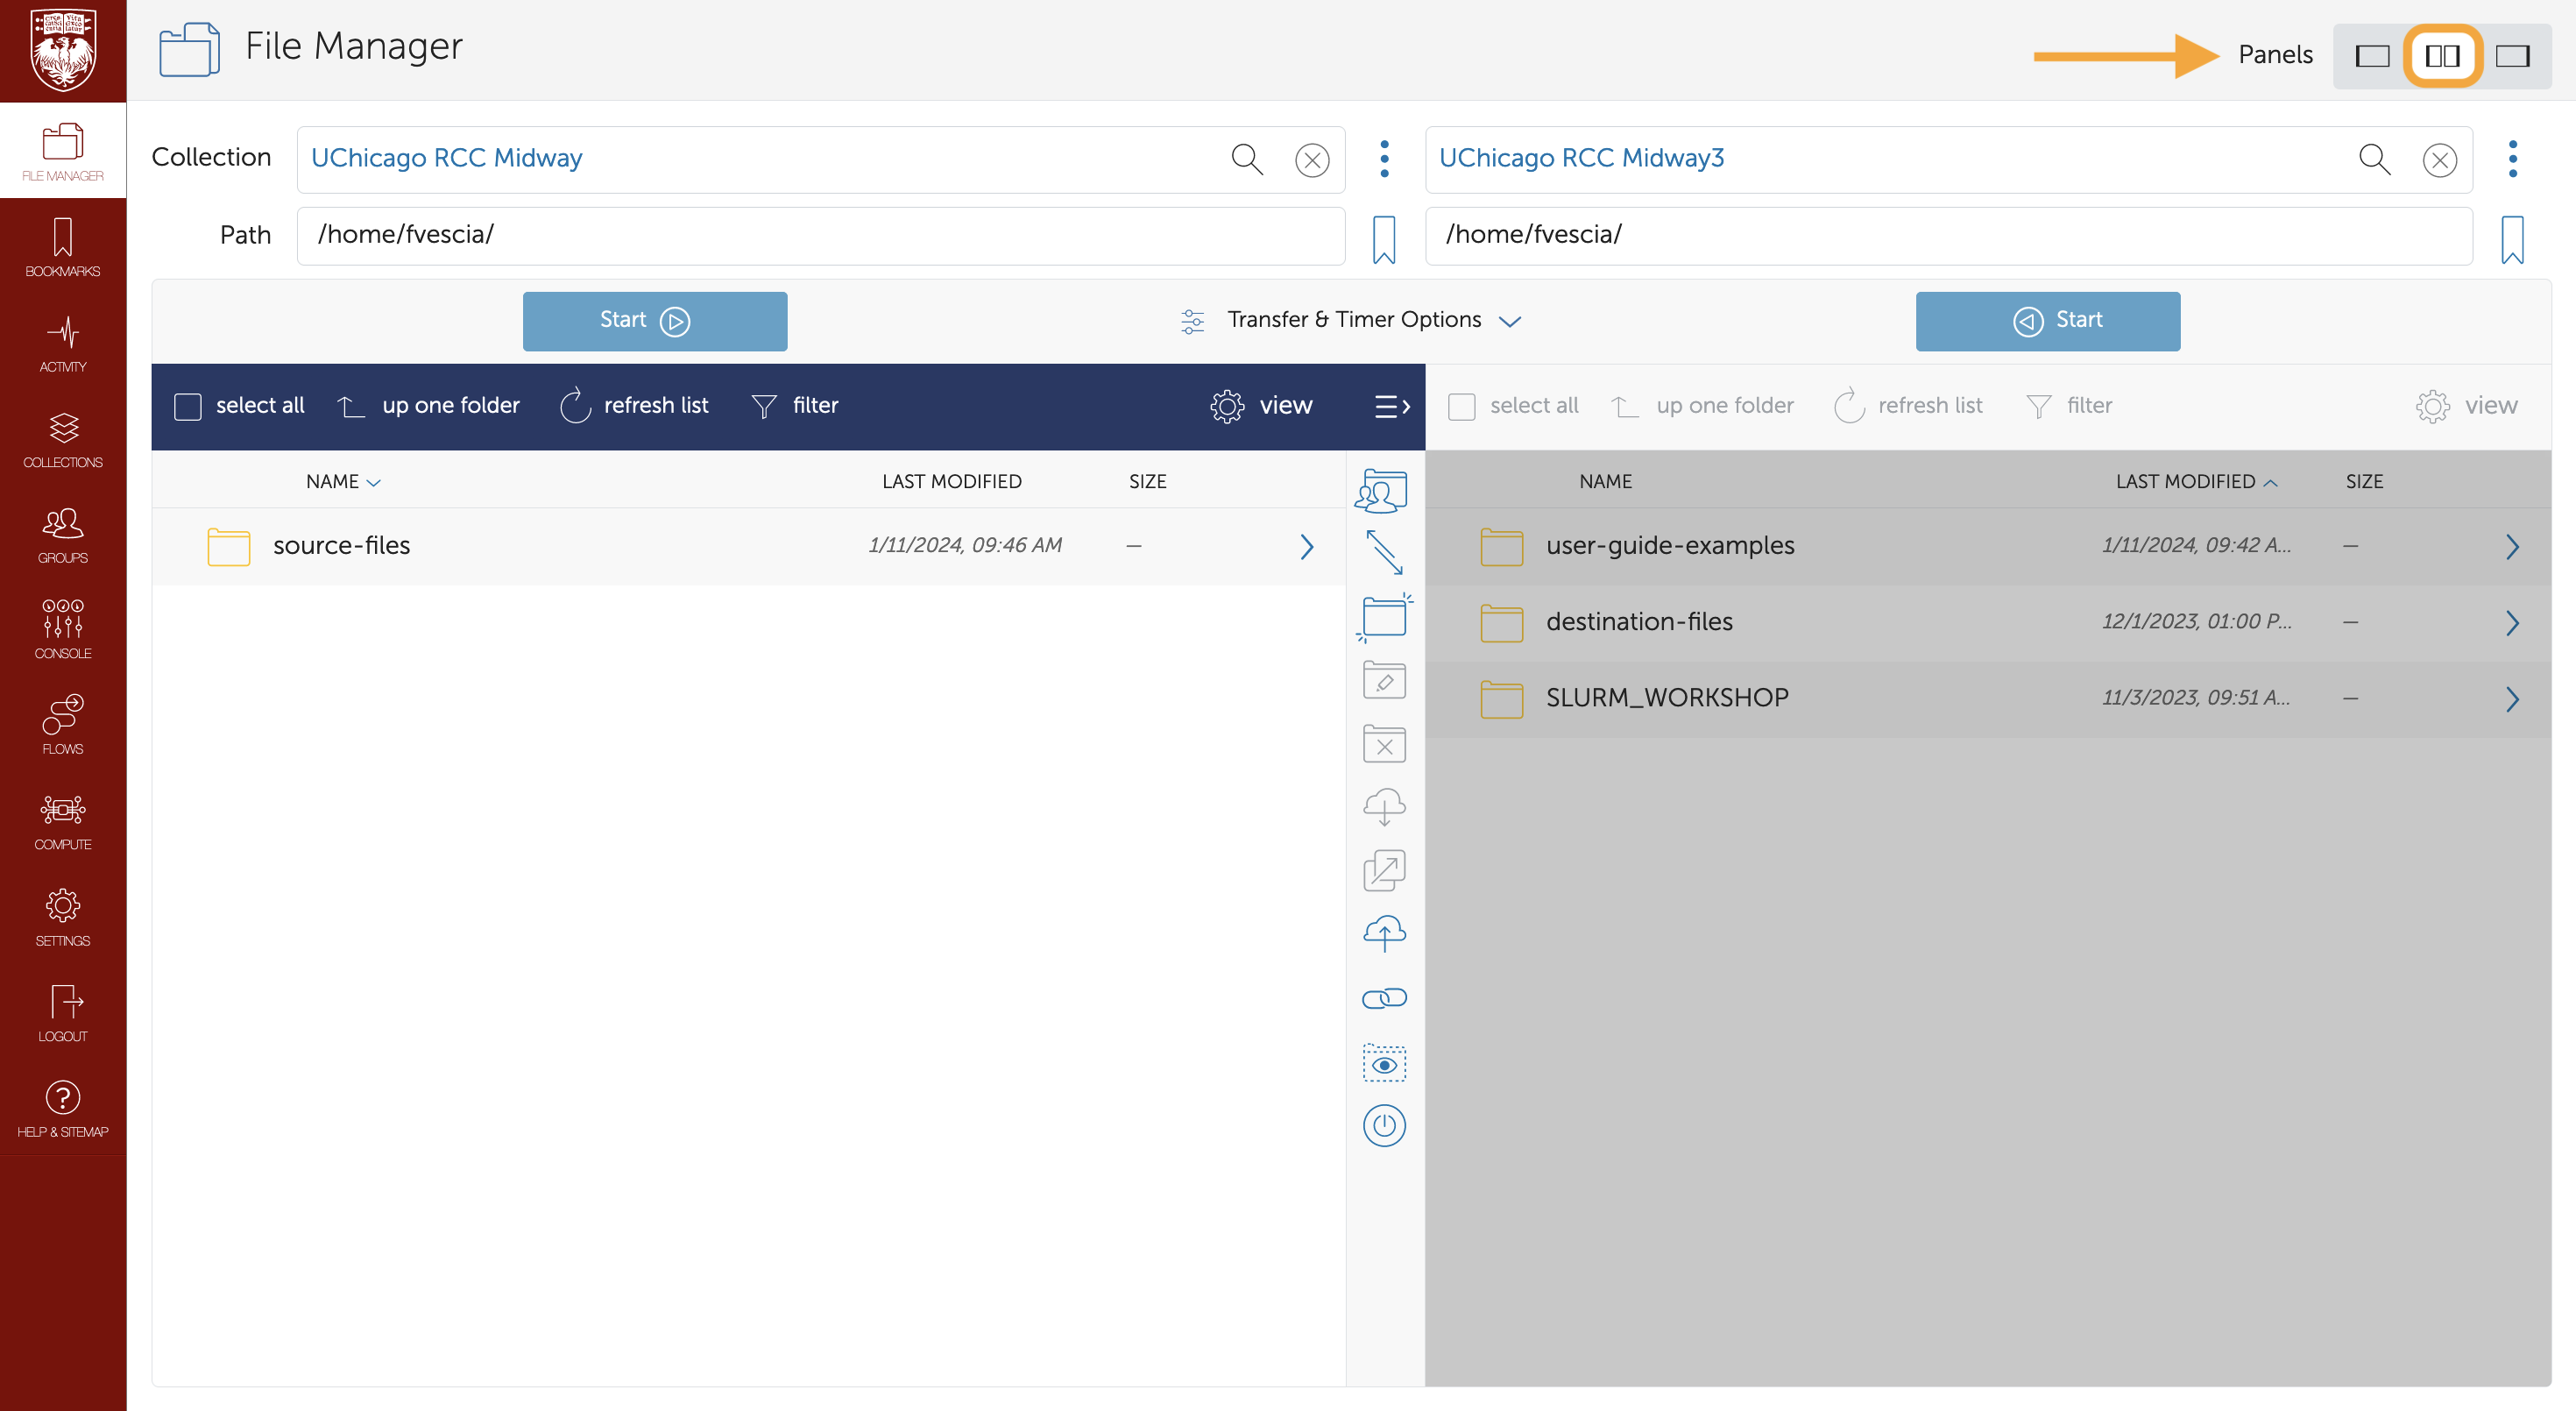
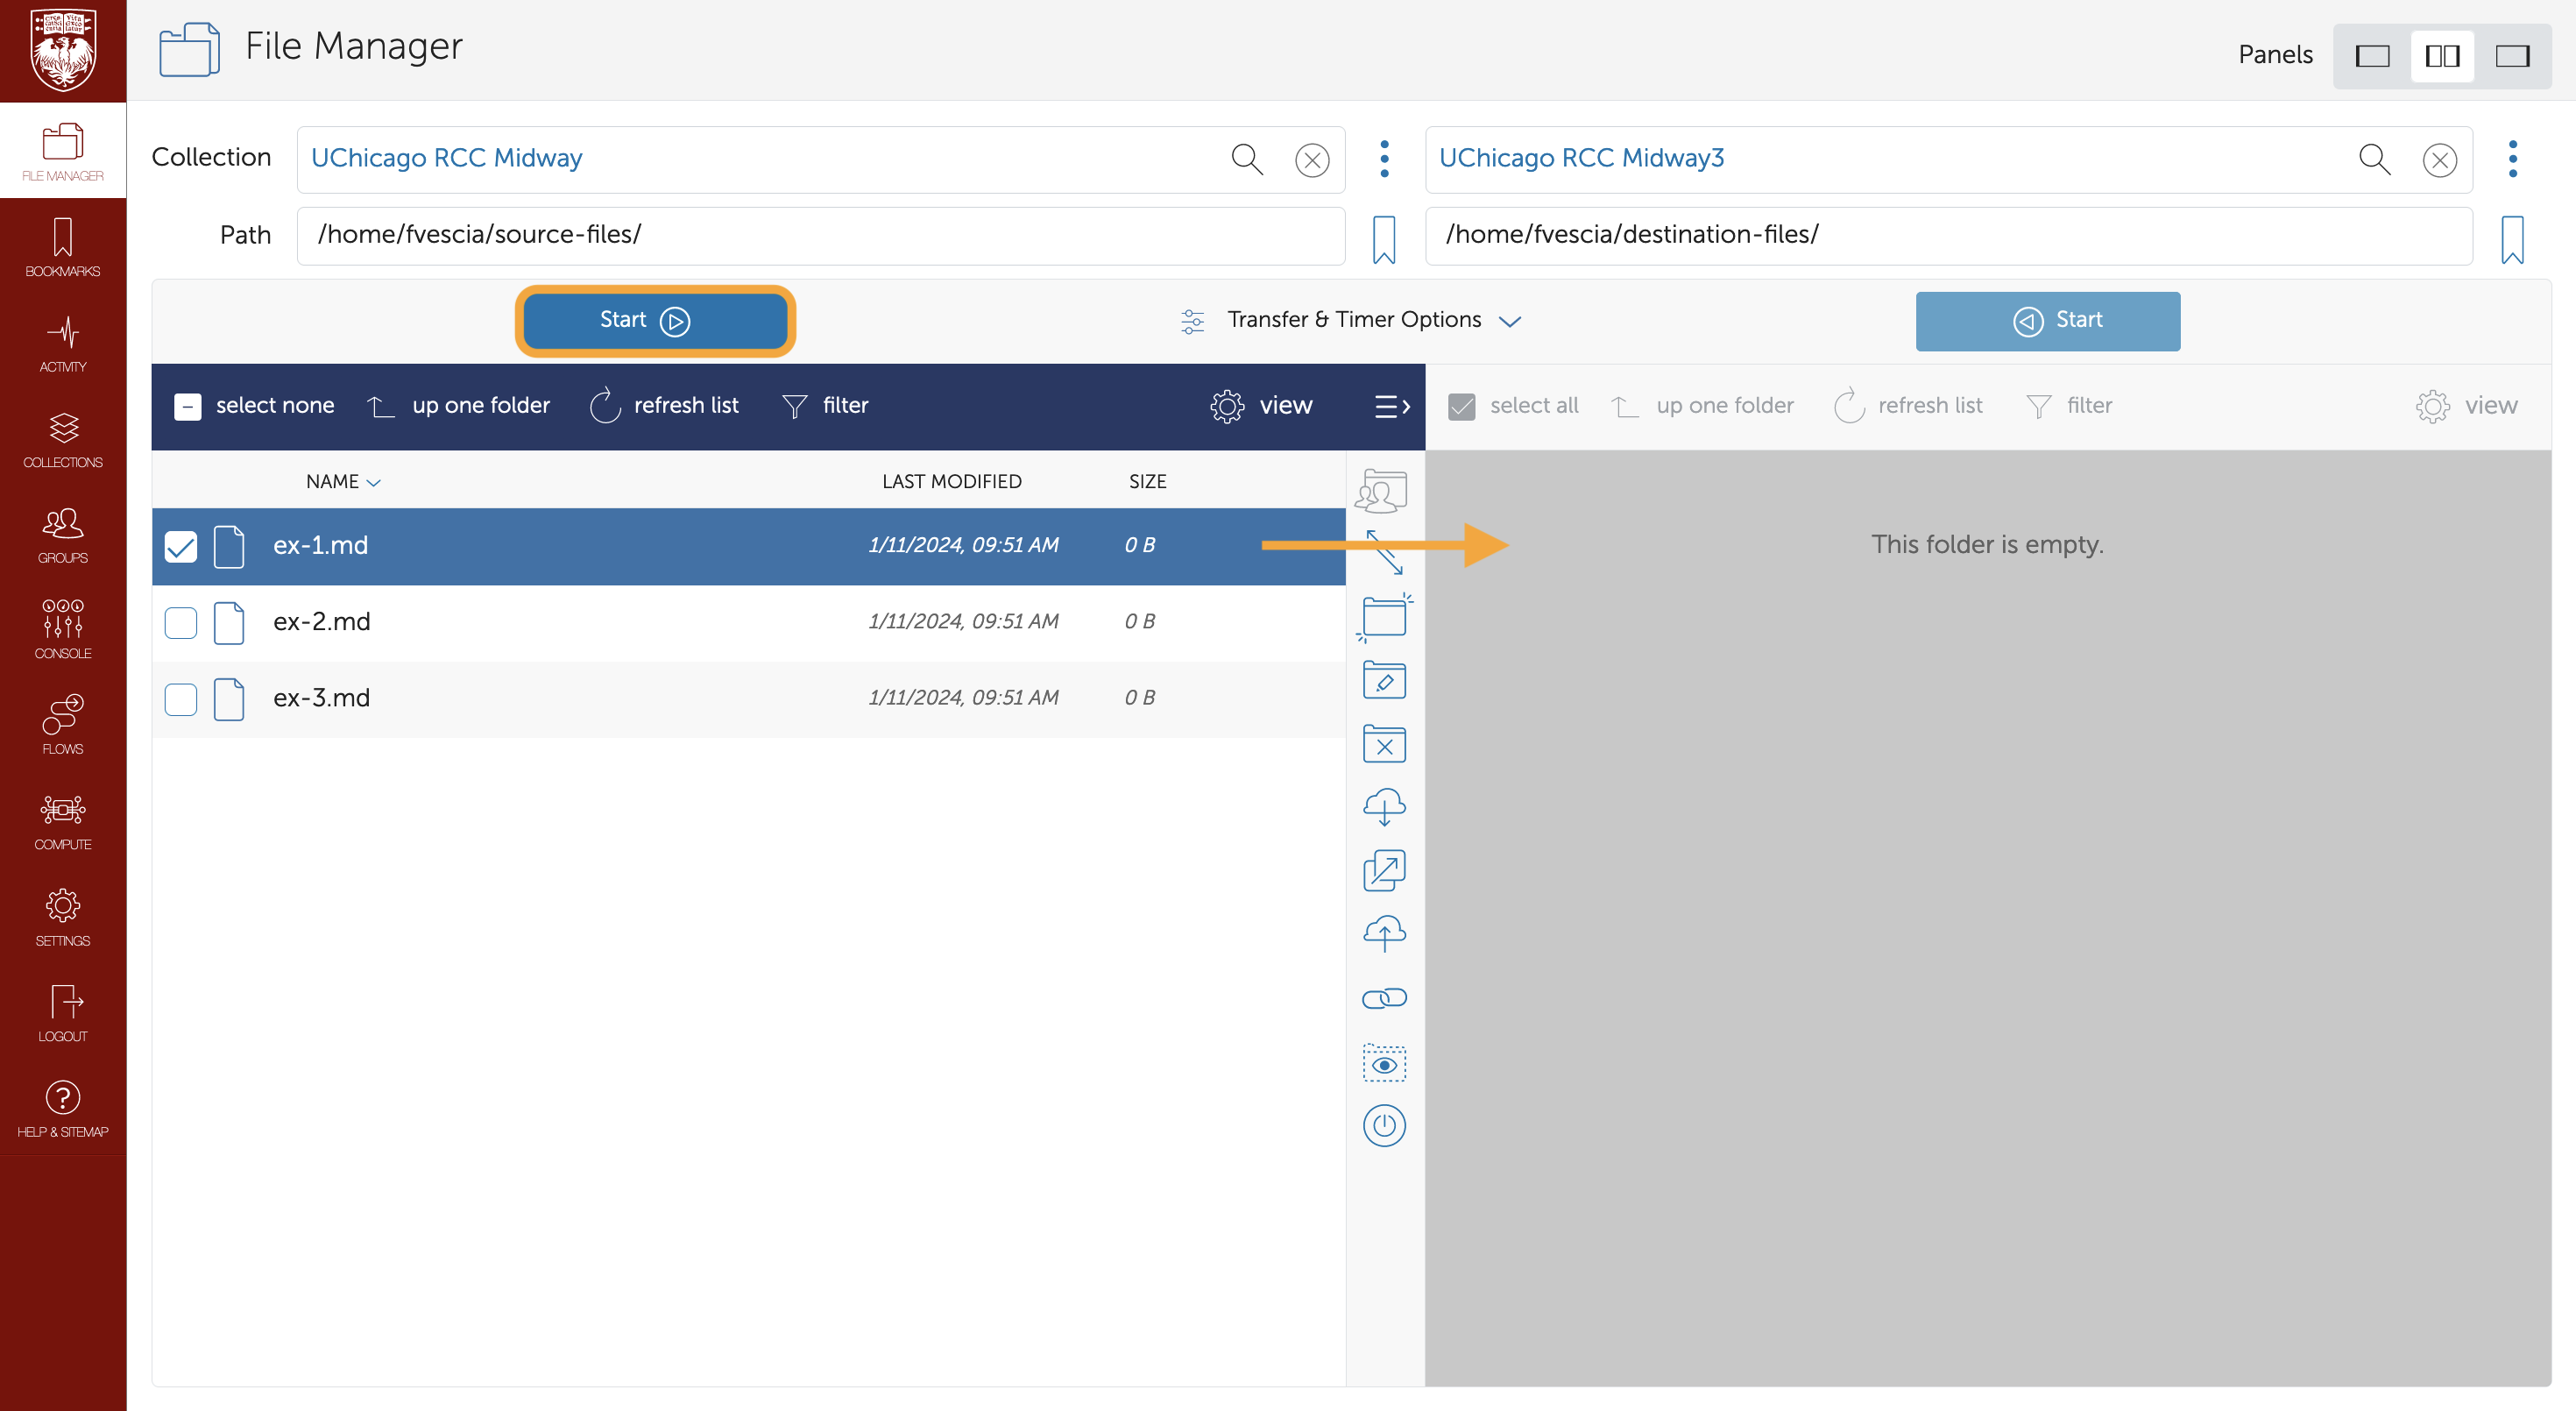
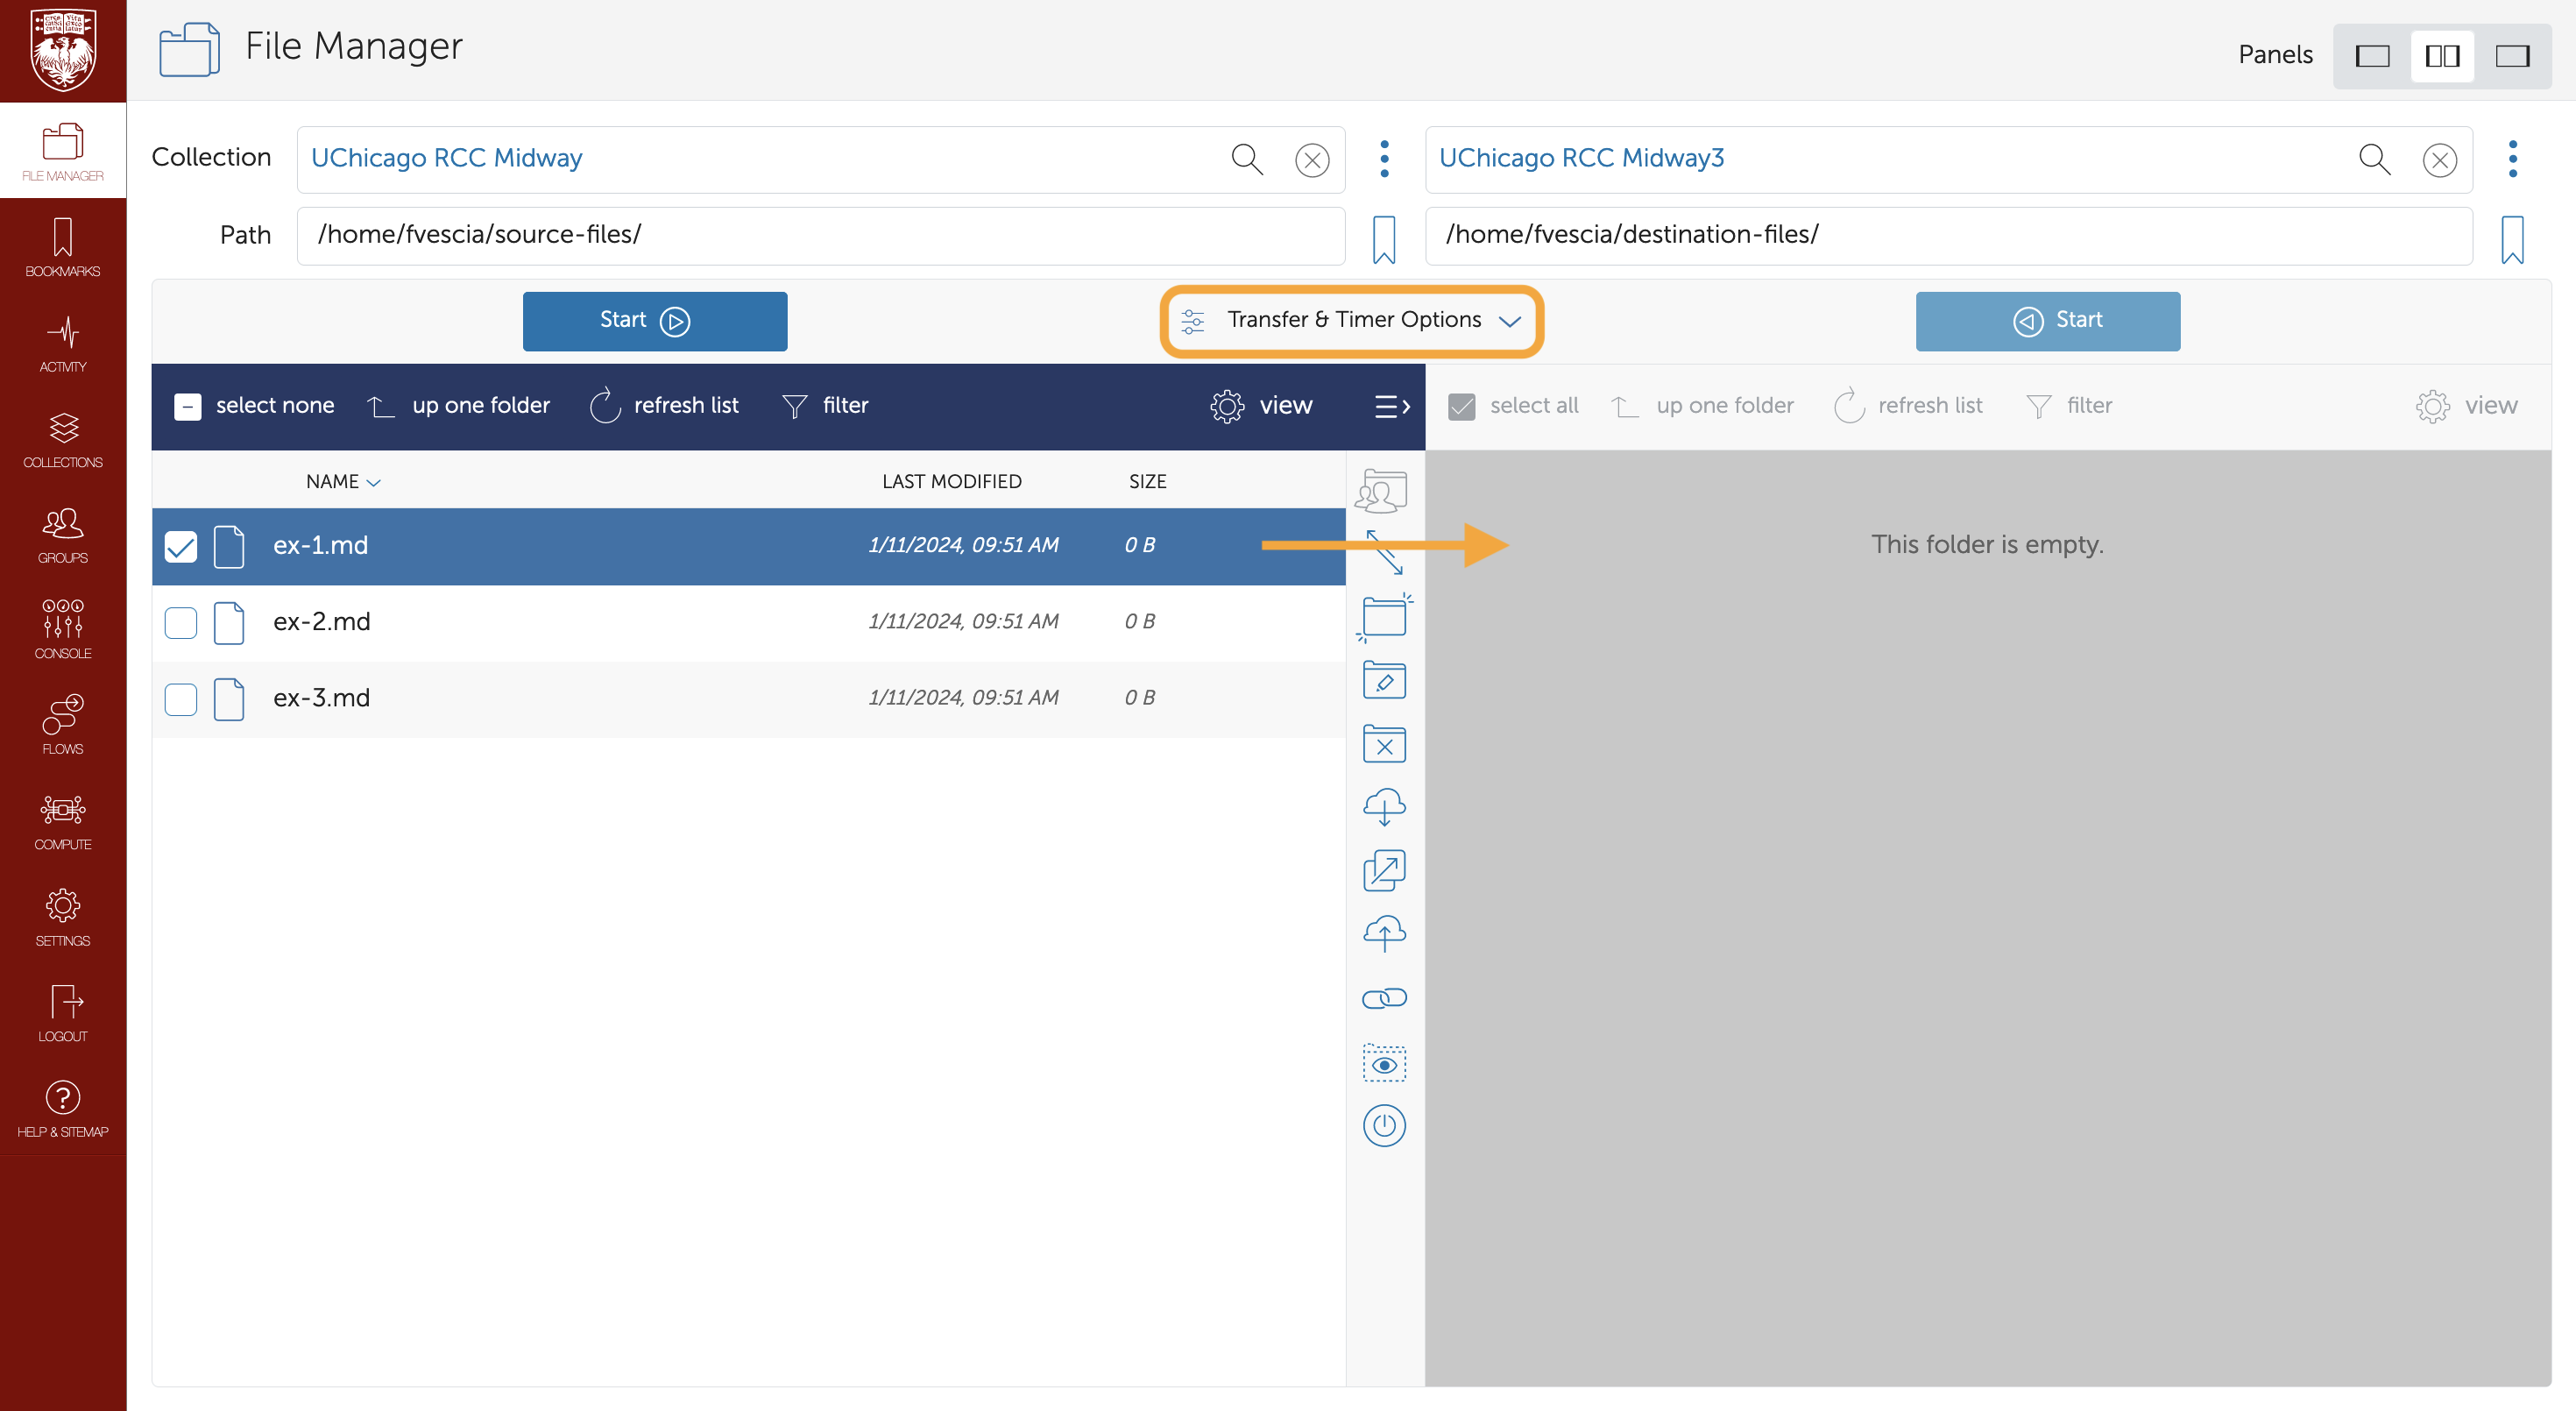
To transfer files between collections, open the source directory (where the files are currently) in one pane of the File Manager and the destination directory (where you want to move the files) in the other. Select the files you want to transfer from the source directory and drag and drop them into the destination directory or click the blue "Start" button above the source directory:
You can customize your transfer with the "Transfer & Timer Options" drop-down menu at the center top of your screen. You can also use this menu to schedule transfers (see below). Advanced users can access additional file transfer functionality by using the Globus command line interface (CLI).
Schedule a File Transfer
To schedule a one-time or recurring file transfer, open the File Manager with your source directory in one pane and your destination directory in the other, as you would for a manual file transfer (see above). Select the files you want to transfer in the source directory, then click "Transfer & Timer Options" at the center top of your screen:
Specify the date and time you would like your transfer to occur with the "Schedule Start" option at the bottom of the menu. If you are scheduling a recurring transfer, this will be the date and time of the first occurrence. Use MM/DD/YYYY for the date and 12-hour time. For example, 12/15/2023, 1:30 PM:

Use the "Repeat" option at the bottom of the menu to schedule a recurring file transfer. Specify how frequently you would like the transfer to occur and, optionally when you would like the transfer to stop. For example, you could schedule a transfer to happen every other day for a year:

Globus Flows
You can also transfer files (and more!) with Globus Flows, which offers a way to set up automated, reusable, and sharable workflows. This is a brief overview of Globus Flows. For a comprehensive guide to the service, including detailed examples, see the Globus Flows documentation.
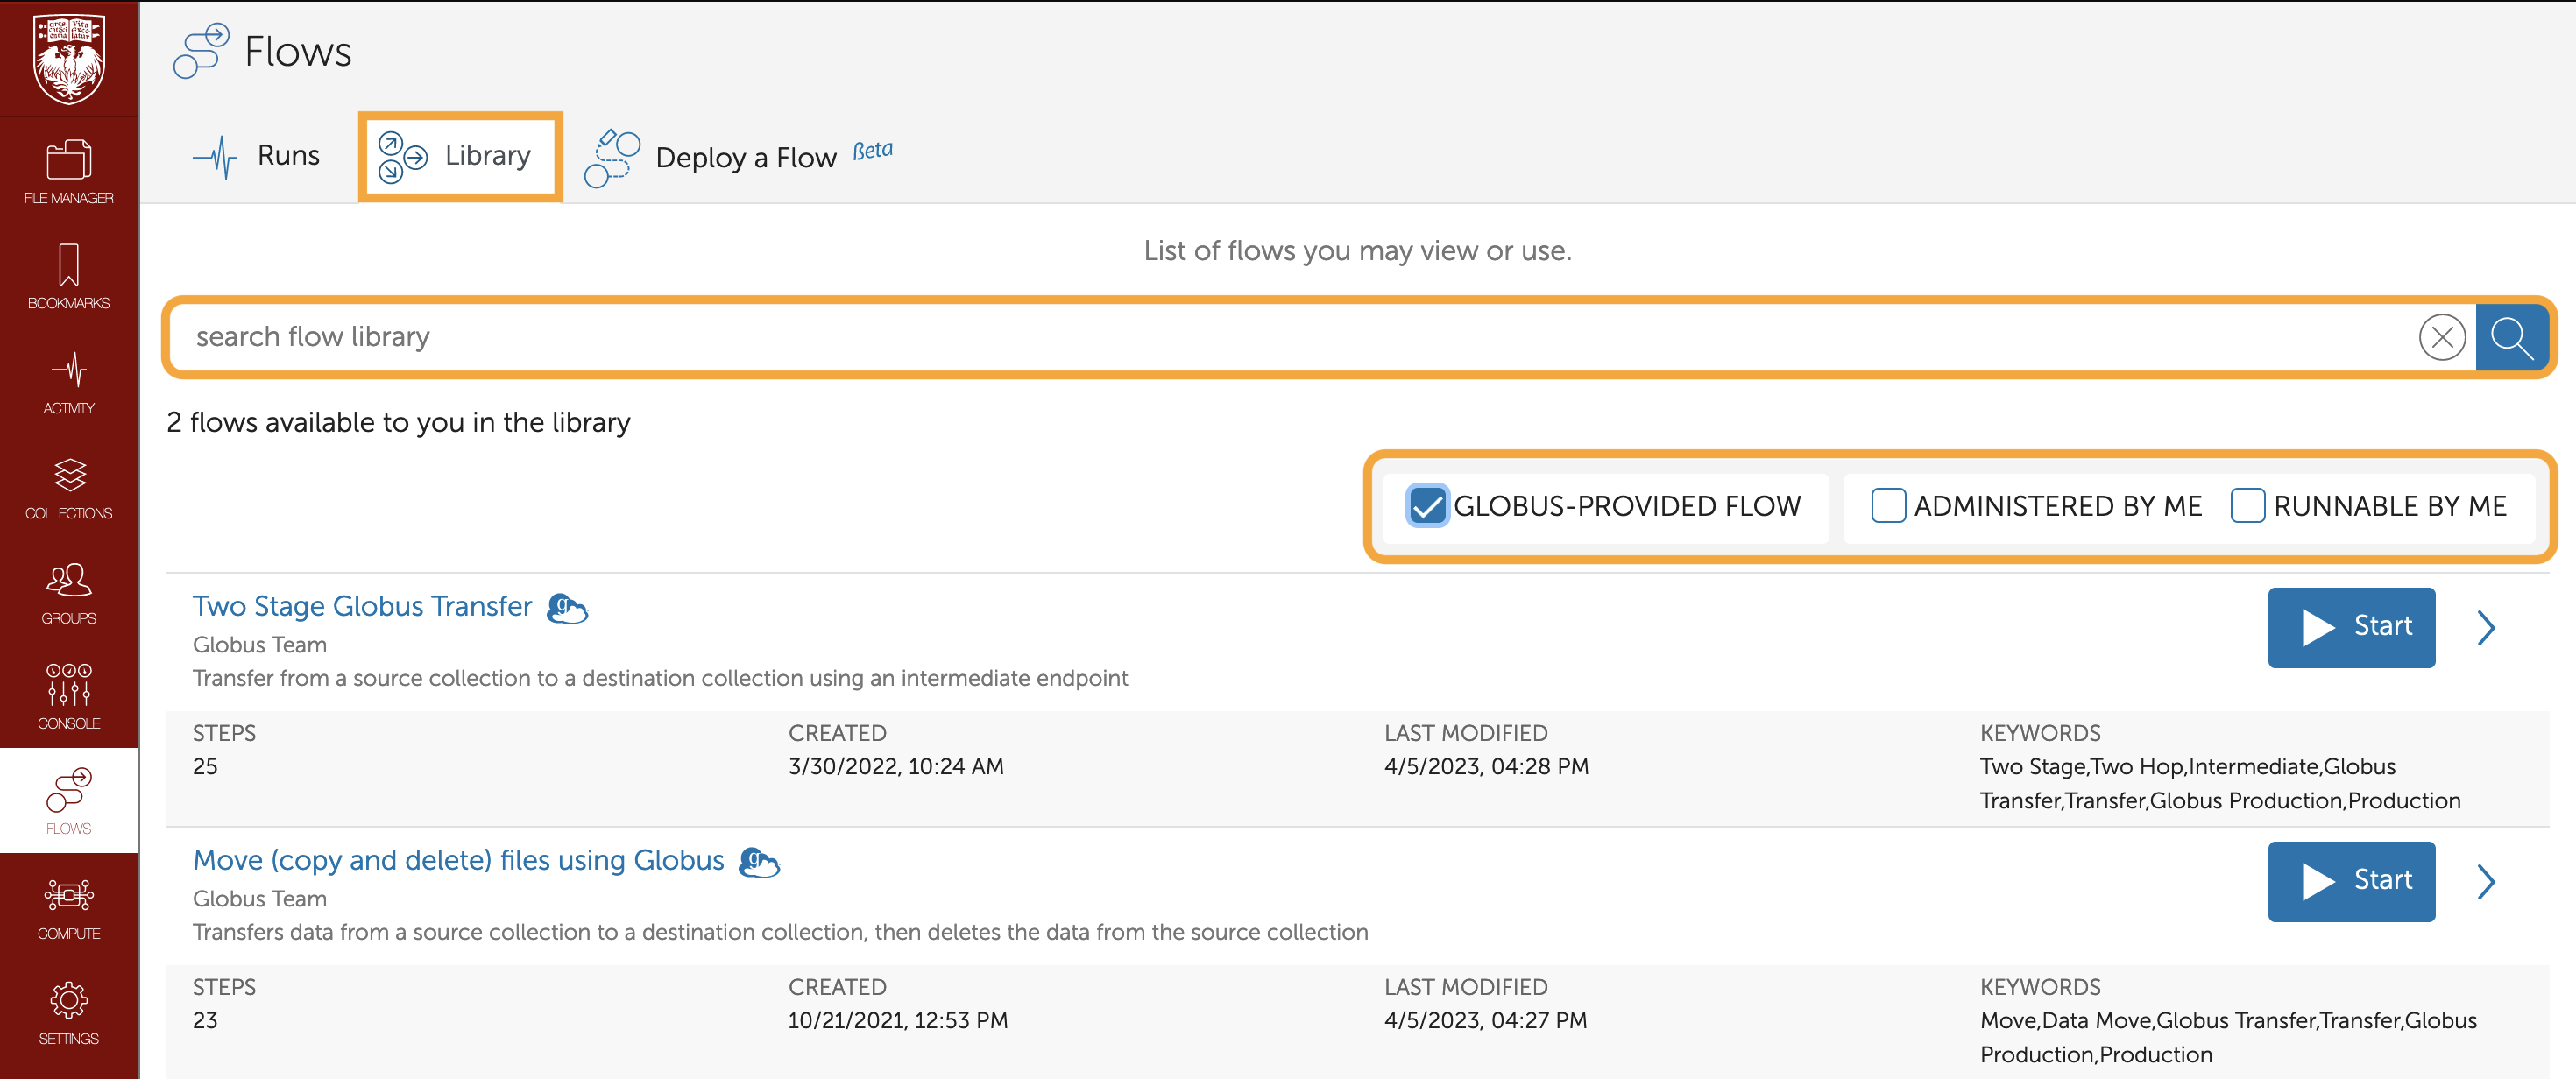
Think of a flow like a function: you run a flow when you want something to happen on Globus, just like you call a function when you want something to happen in your code. Globus offers two ready-made flows:
-
The Move (Copy and Delete) flow copies data between collections then deletes the original data from the source collection.
-
The Two-Stage Transfer flow copies data between two collections using a third collection as an intermediate location, which can be useful for meeting security and compliance requirements
You can also run flows other Globus users have created, just like you can call functions from different libraries, or create custom flows, just like you can define your own functions.
To work with Globus Flows, go to the Flows section of the Globus Web App. The first time you click into the Flows section, you will need to give Globus permission to manage flows on your account:
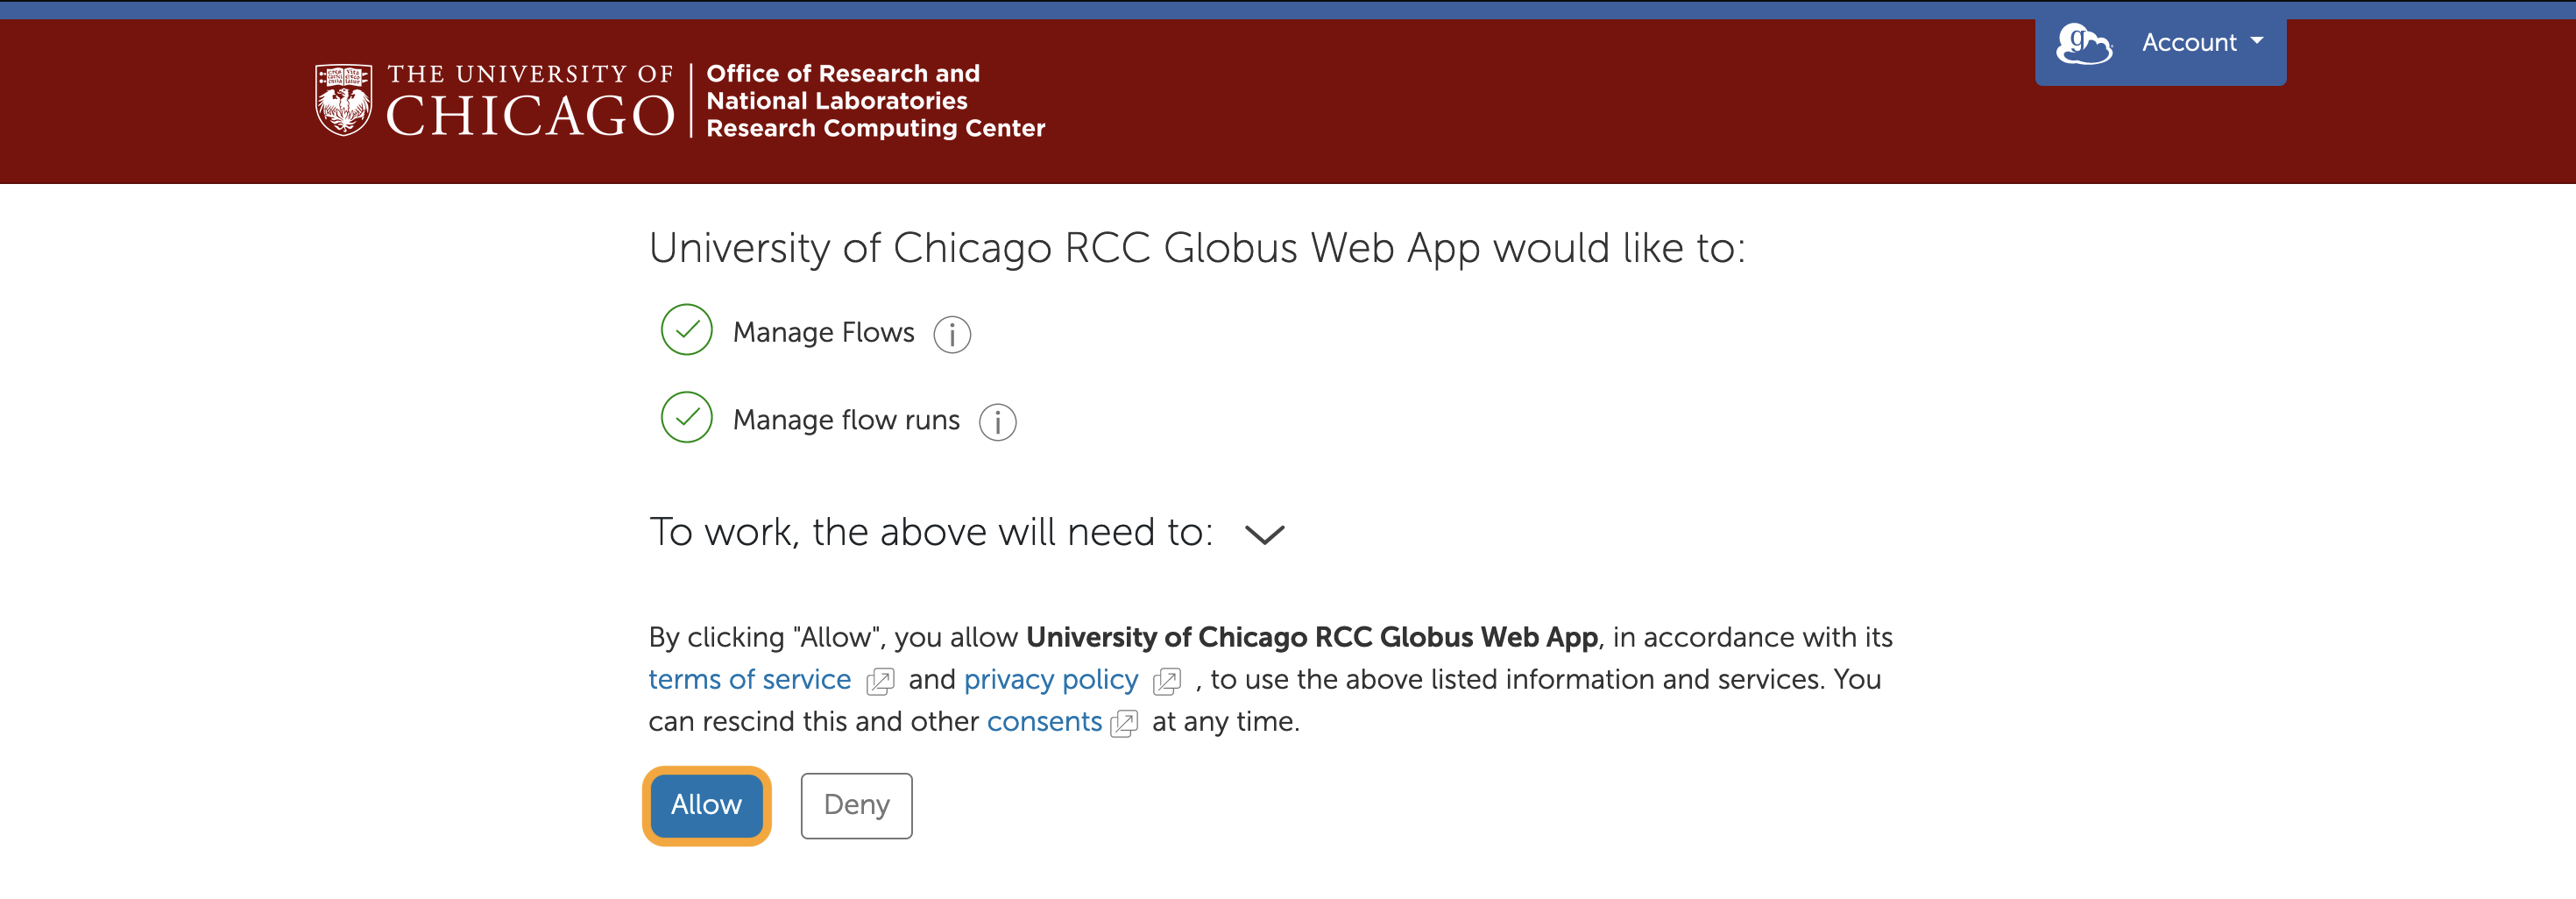
When you click "Allow," Globus will route you to the Runs tab of the Flows section:
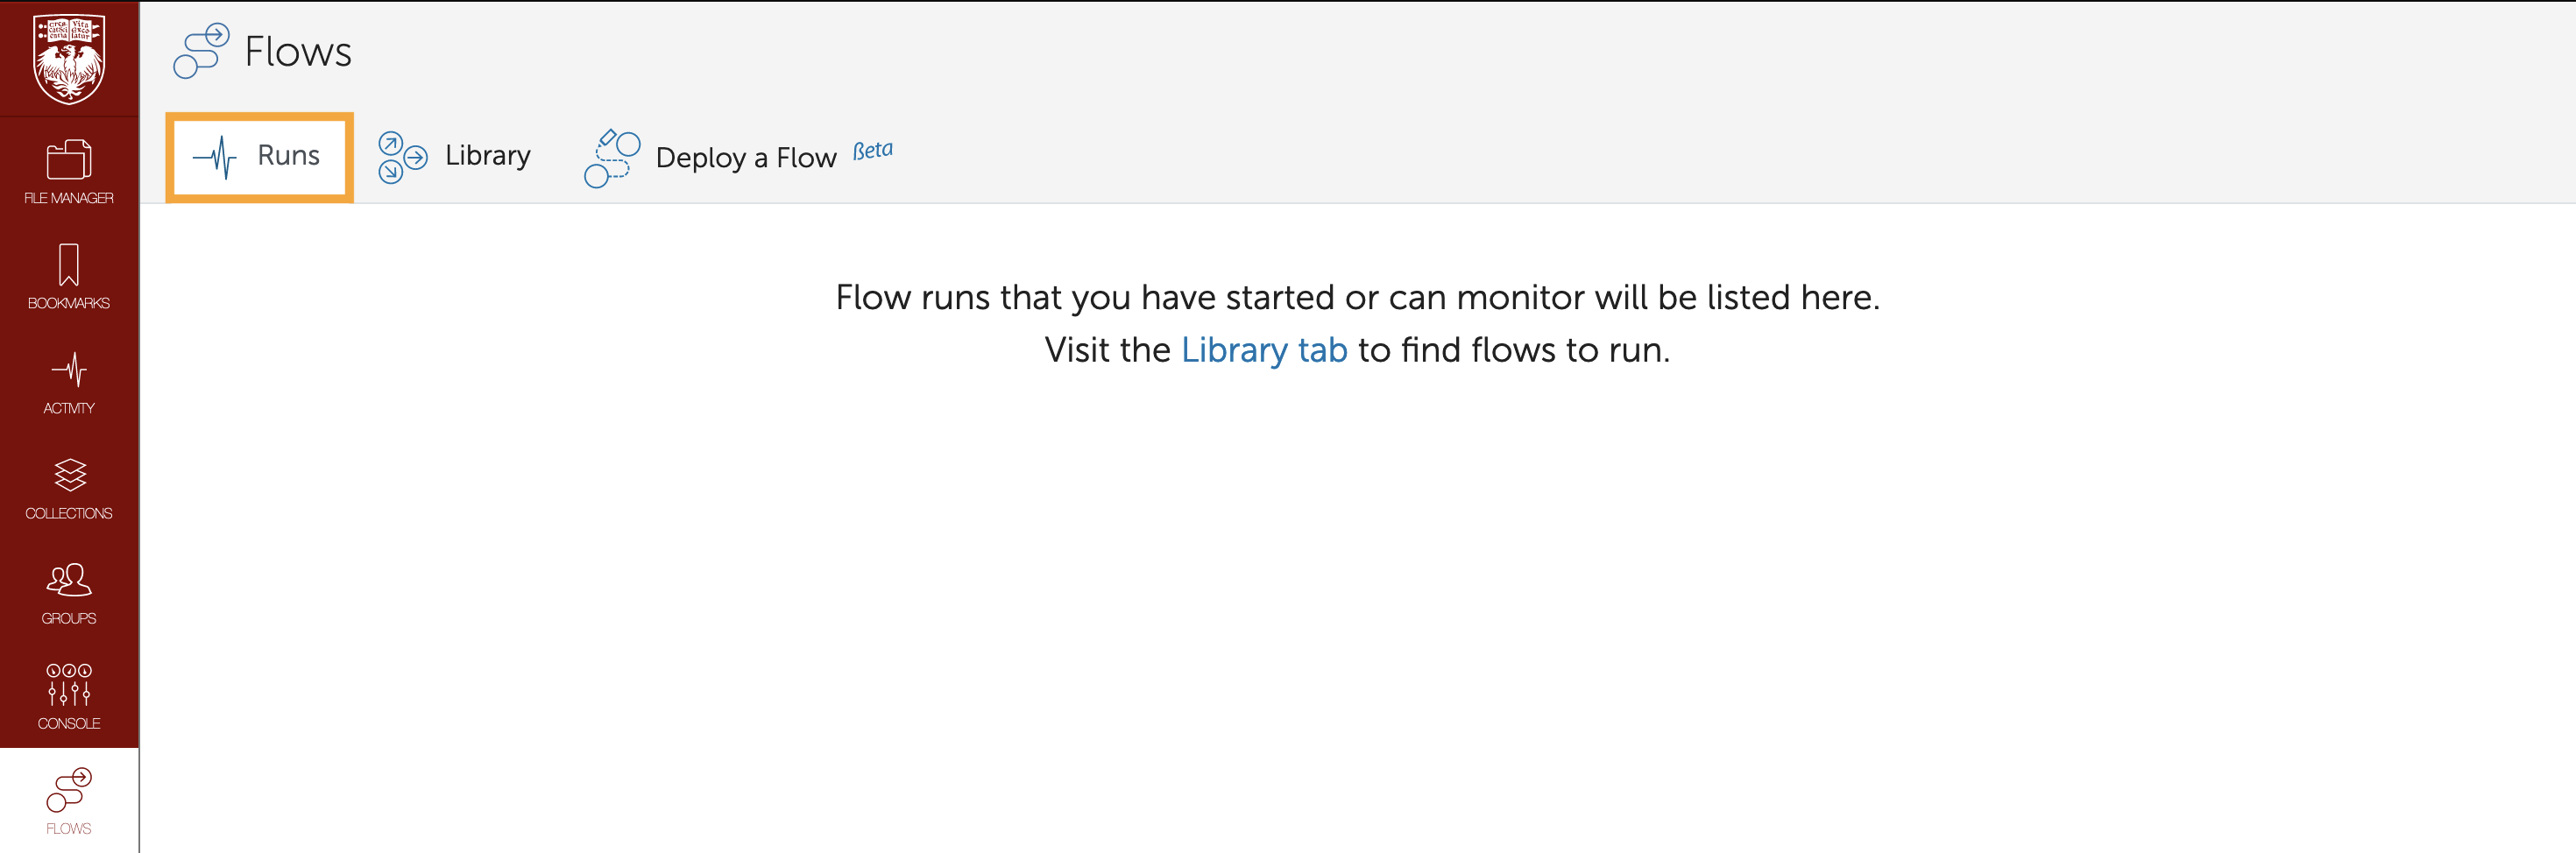
A full list of flows you can view or use is available in the Library tab. Use the search bar at the top of the page to search for flows and/or the filters in the top-right corner to narrow down your options:
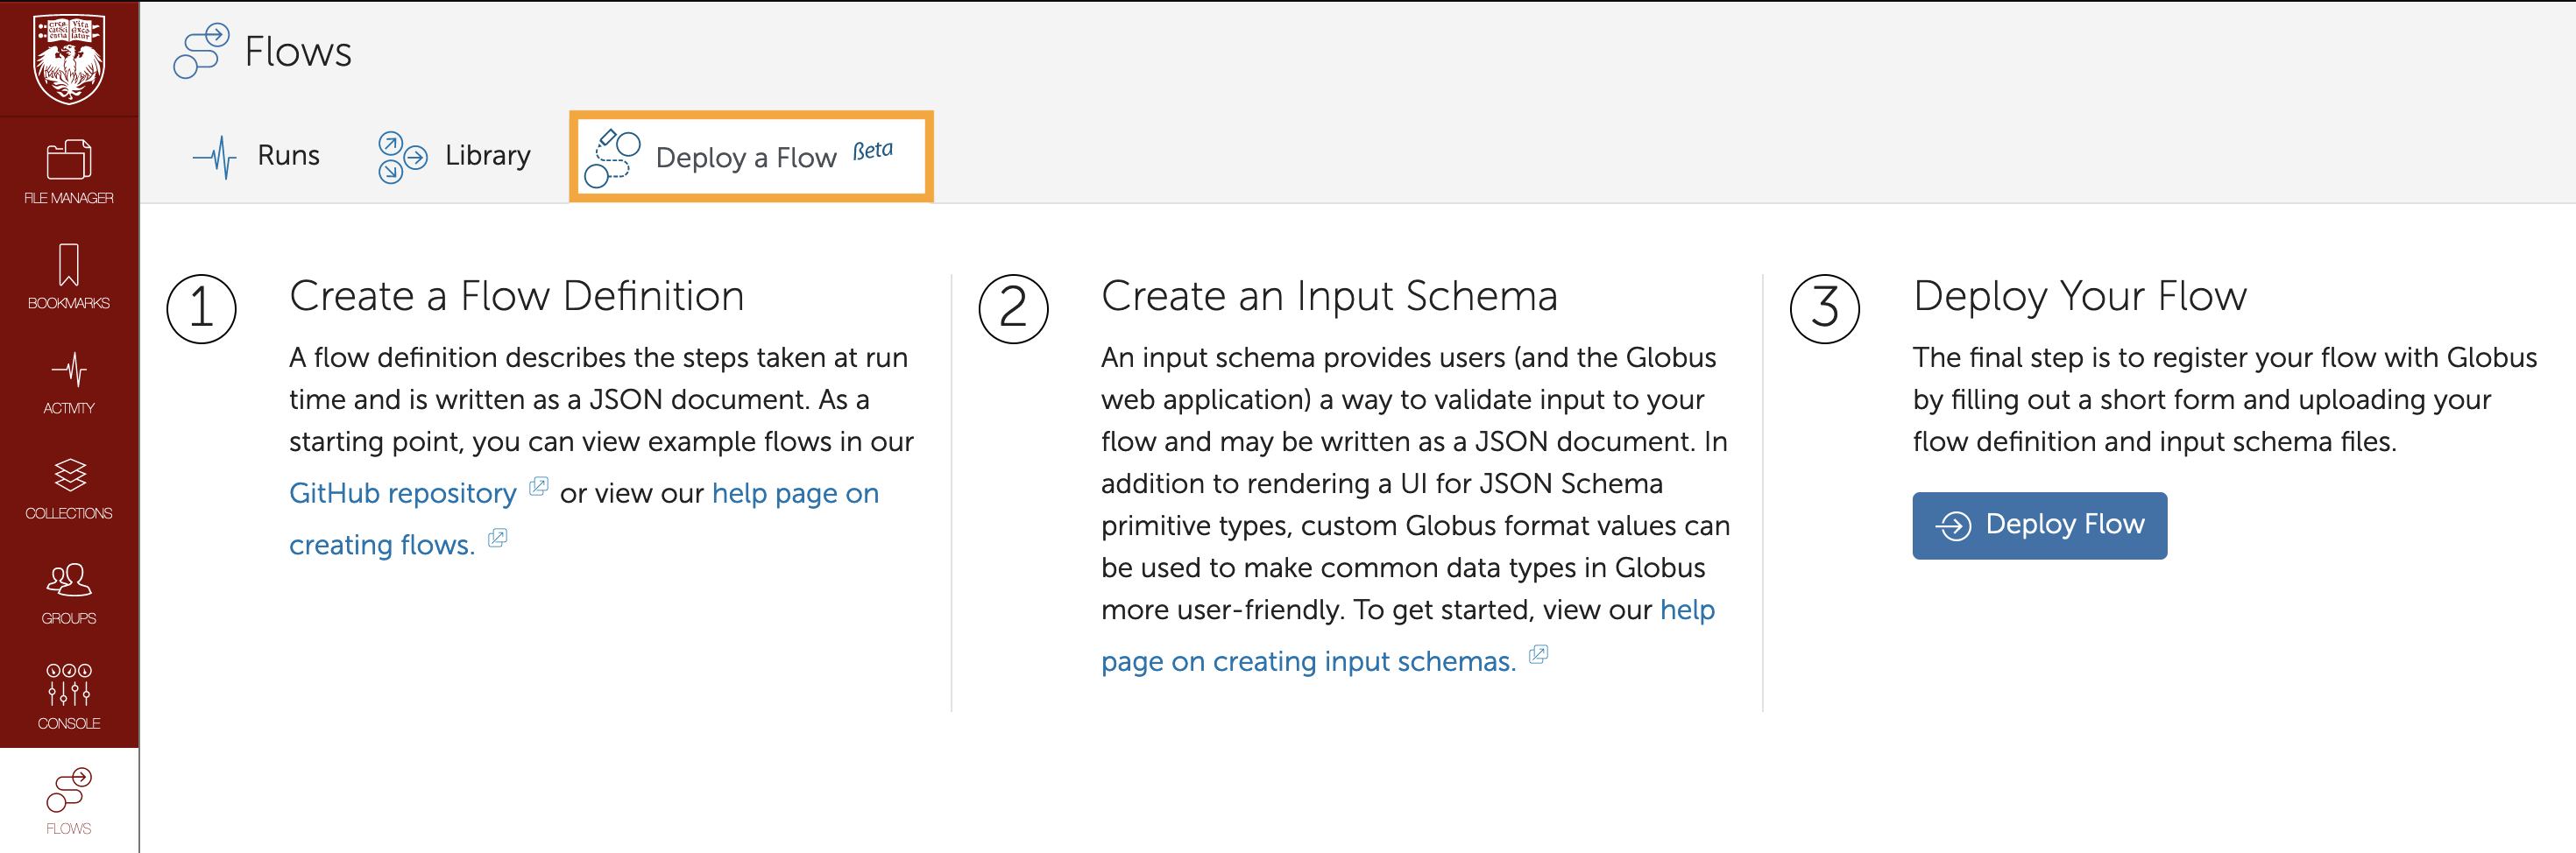
Steps for creating additional, custom flows are listed in the Deploy a Flow tab: